Making a plan
You have just been randomly assigned to work with a partner – find them now.
The following T-shirt – available for purchase if you’re interested – is offered without comment:

Have the planning sheet you were given ready:
With your partner, draw the design shown in this animation on your planning sheet:
Look for Patterns
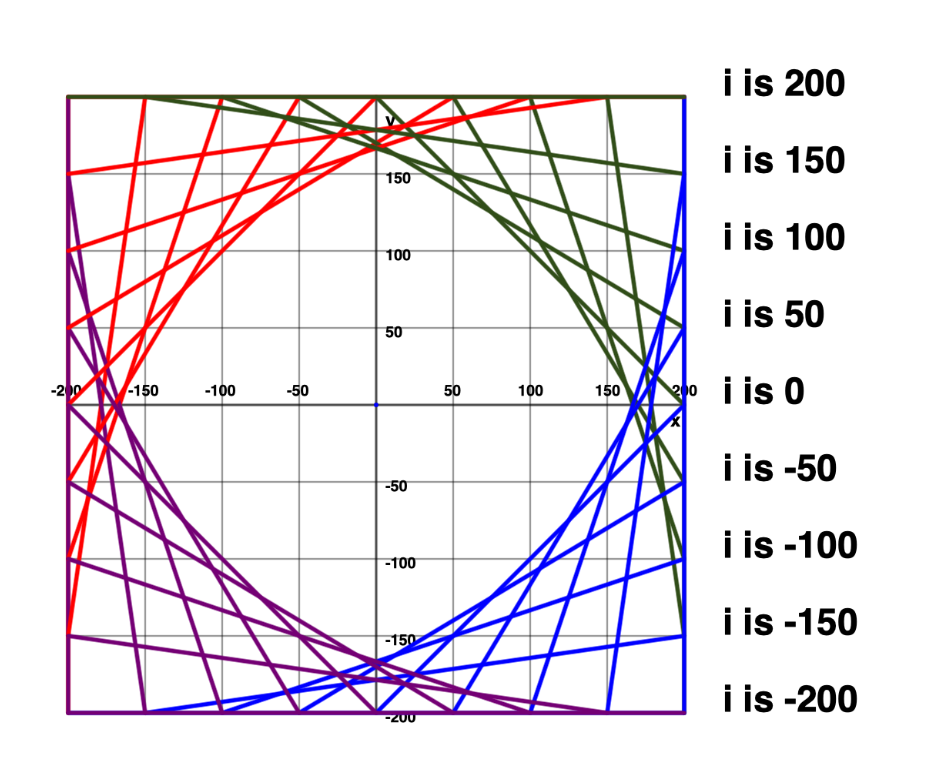
Assume that the lower left corner is at .
Consider the start and end points for each line.
L👀K for patterns – what do you notice?
What changes?
What stays the same?
TIP
Don’t worry about color – that is used only for illustration and discussion purposes.
After examining start and end points:
You may have noticed that:
- the position of the start of each line increases by 50 from one line to the next
- the position of the start of each line stays constant at -200
Likewise:
- the position of the end of each line stays constant at 200
- the position of the end of each line increases by 50 from one line to the next
Applying Iteration
We can use another form of a loop in Swift to express this kind of numerical pattern.
You already know how to express a loop that counts from 1 through 10:
for i in 1...10 {
	// code to repeat goes here
	// "i" begins at 1, changes to 2, then 3, then 4...
	// and ends at 10
}
To express a loop that counts from 2 through 10, by 2’s, we would write:
for i in stride(from: 2, through: 10, by: 2) {
    // "i" begins at 2, changes to 4, then 6...
    // ending at 10
}
We can use that same type of syntax to express the pattern:
… that we observed when making our plan.
Here is what the code looks like:
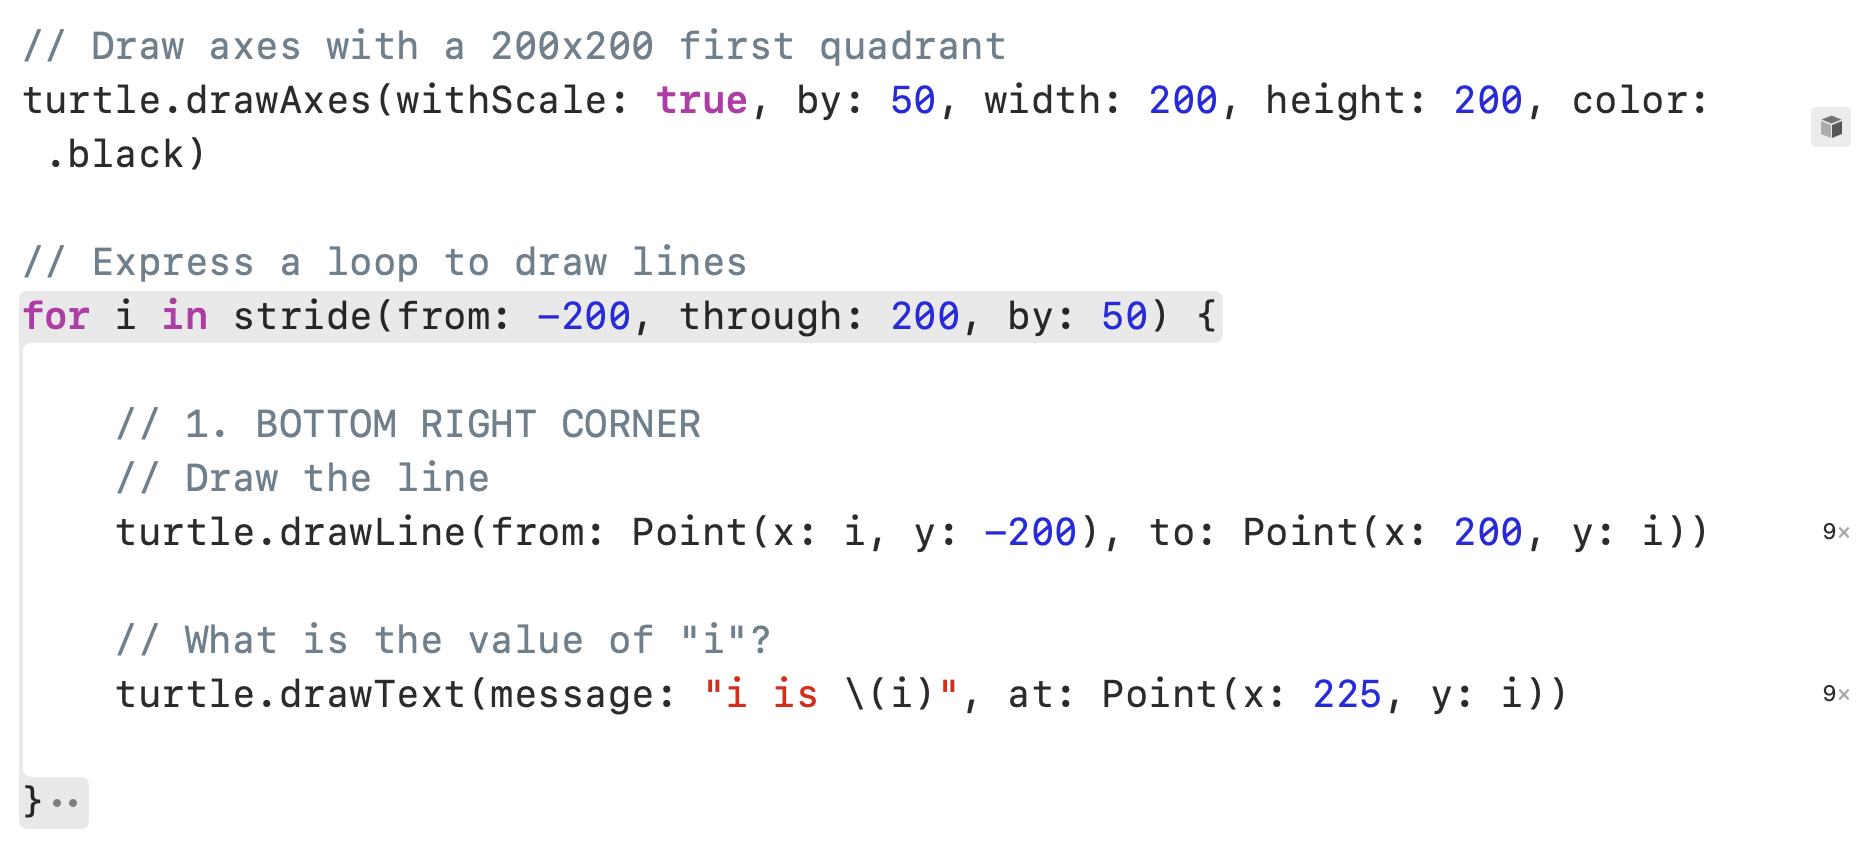
The variable i holds the numerical value that changes.
We use i for the position of the from point and for the position of the to point.
The code above will produce the following result:
Exercises
-
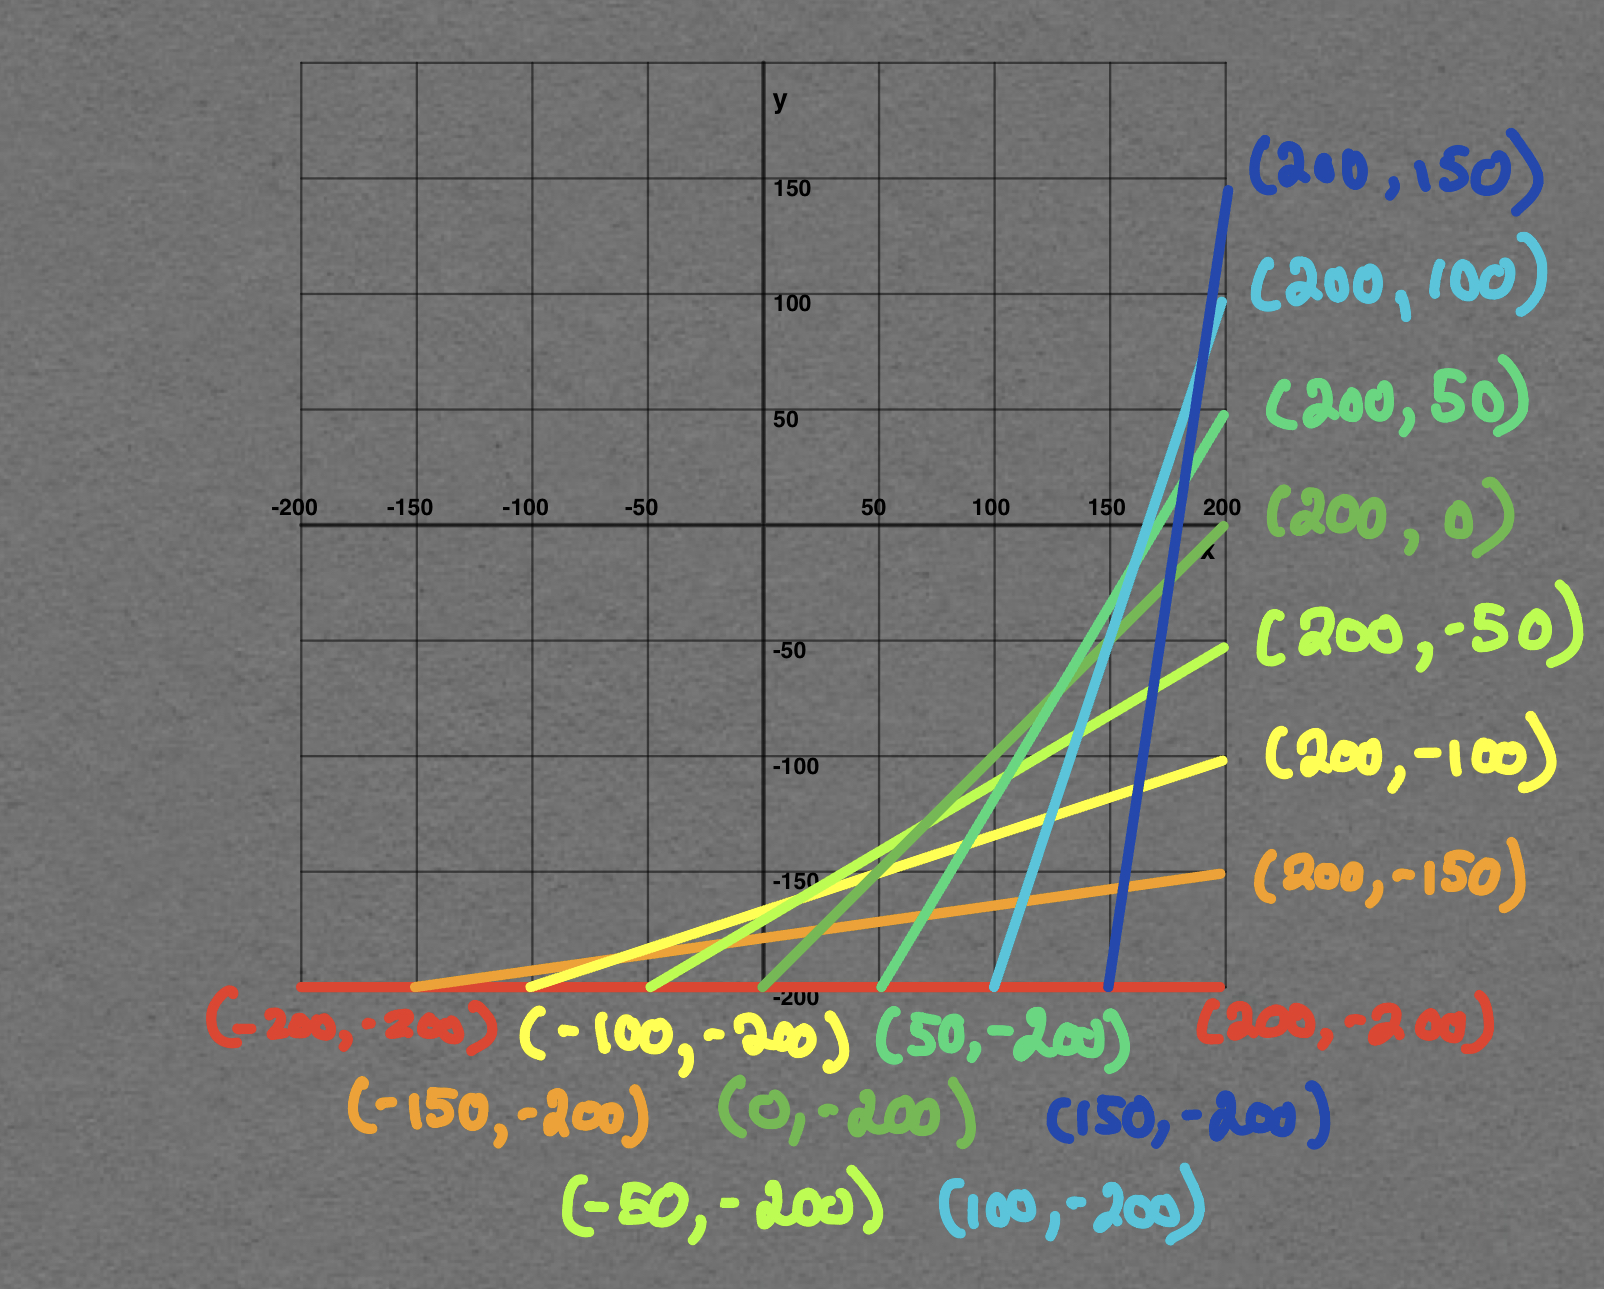
Continue building out your plan so that you spot the patterns in the and values for the
fromandtopoints needed to draw the red lines shown here: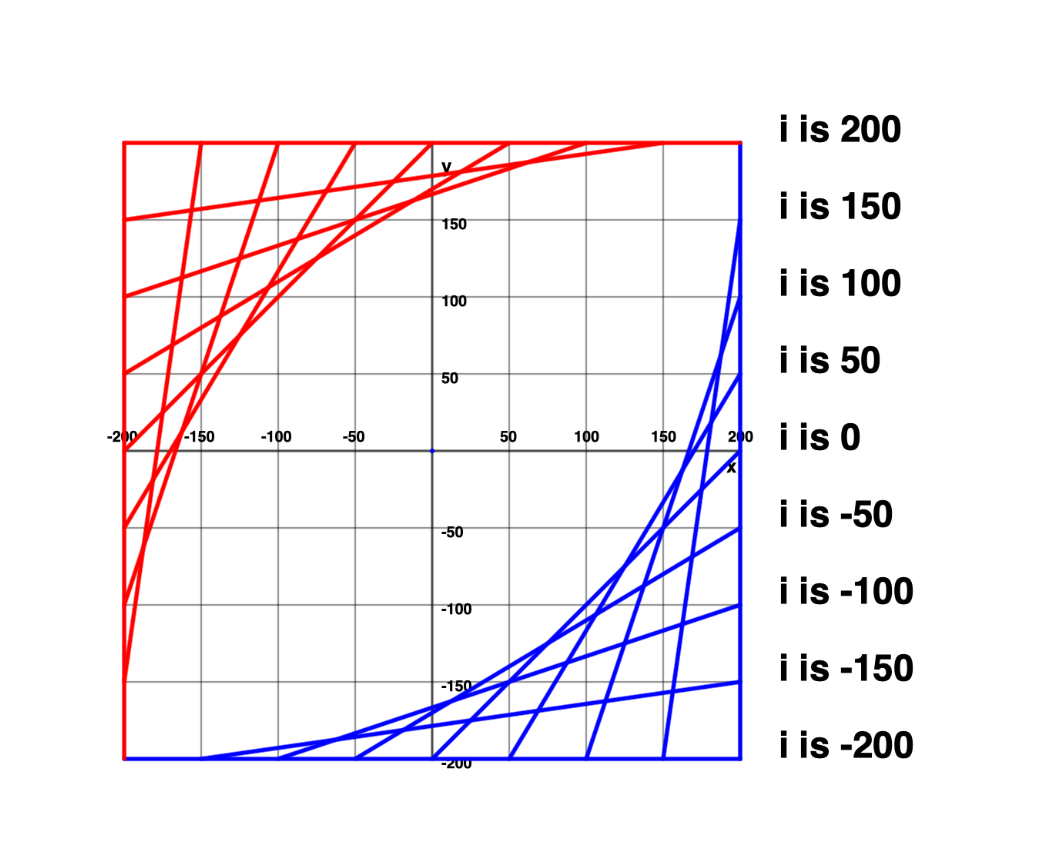
-
Make further additions to your plan and spot patterns in and values to draw the next corner of the design:

HINT
It may be helpful to consider a mathematical expression involving addition, subtraction, multiplication, or division that would let you use the existing loop to draw the green lines.
-
Finally, make changes to your plan and code to express the final corner of lines, shown here in purple: