Common problems
Floaters
Objects with floating components, or components that are just barely connected, will not print, or will break easily.
For example, the R in this design, viewed from the top-down, looks good to go:
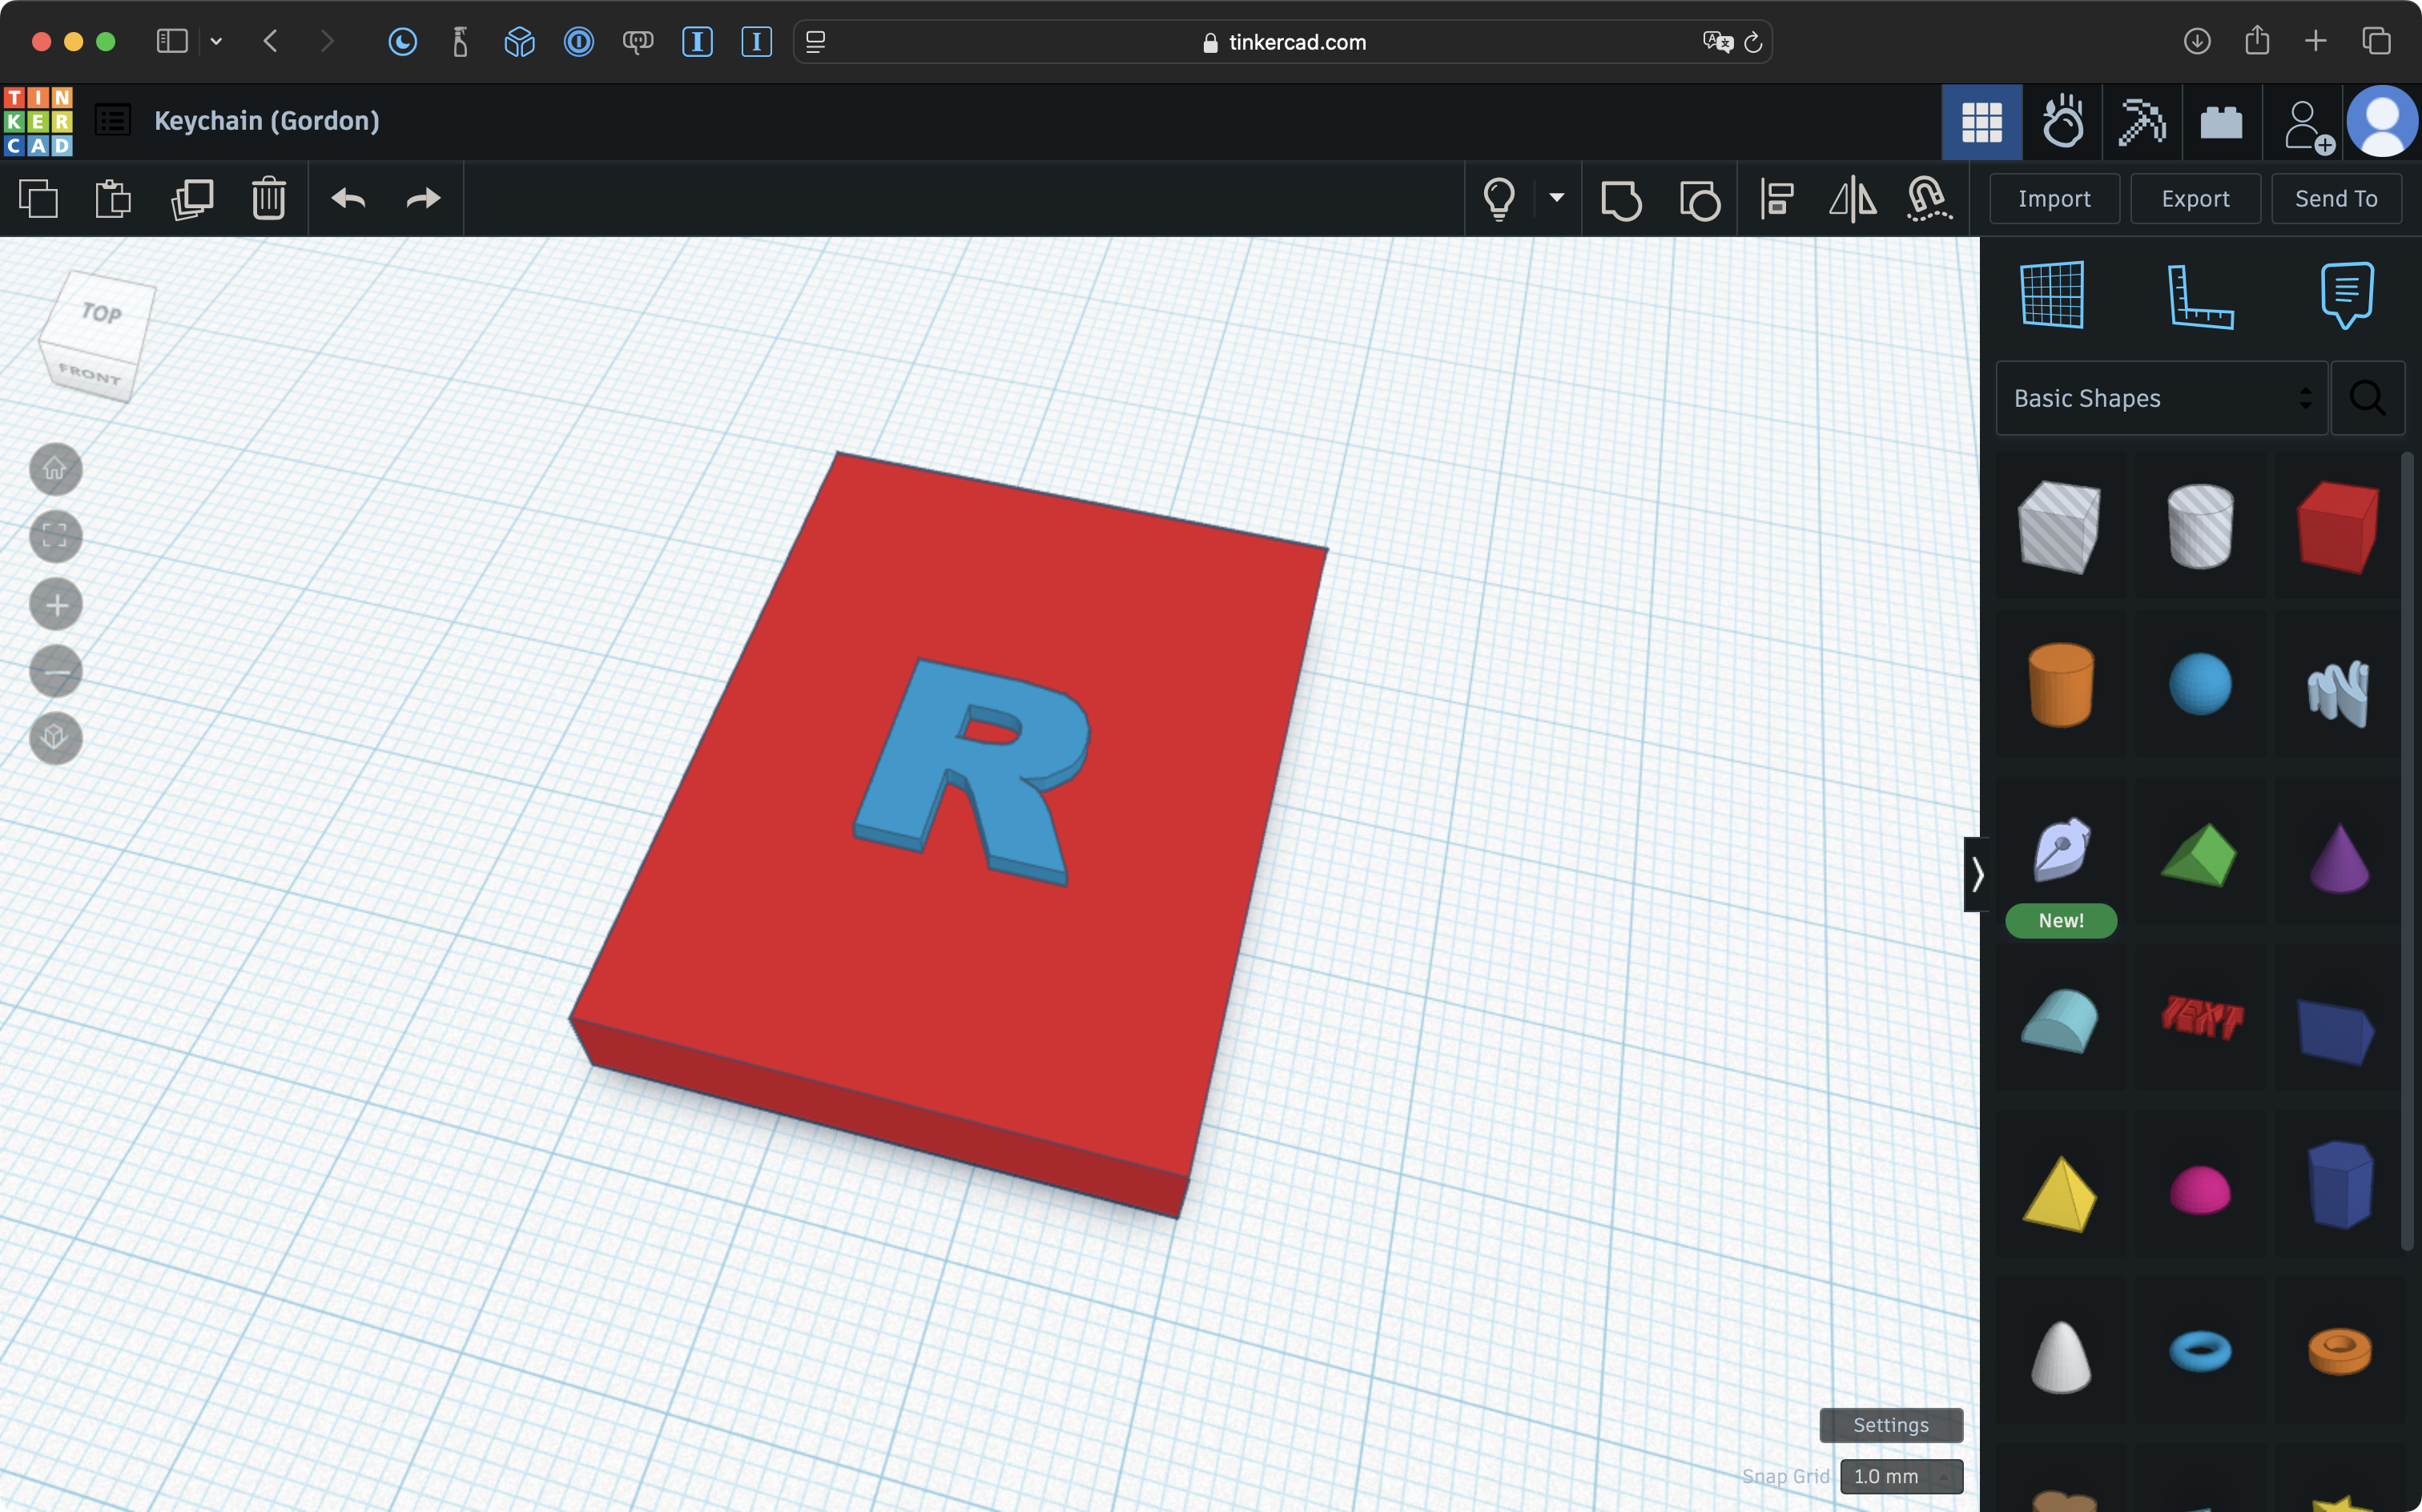
However, if the design is rotated, we see that the R is floating above the rectangular prism base below it:
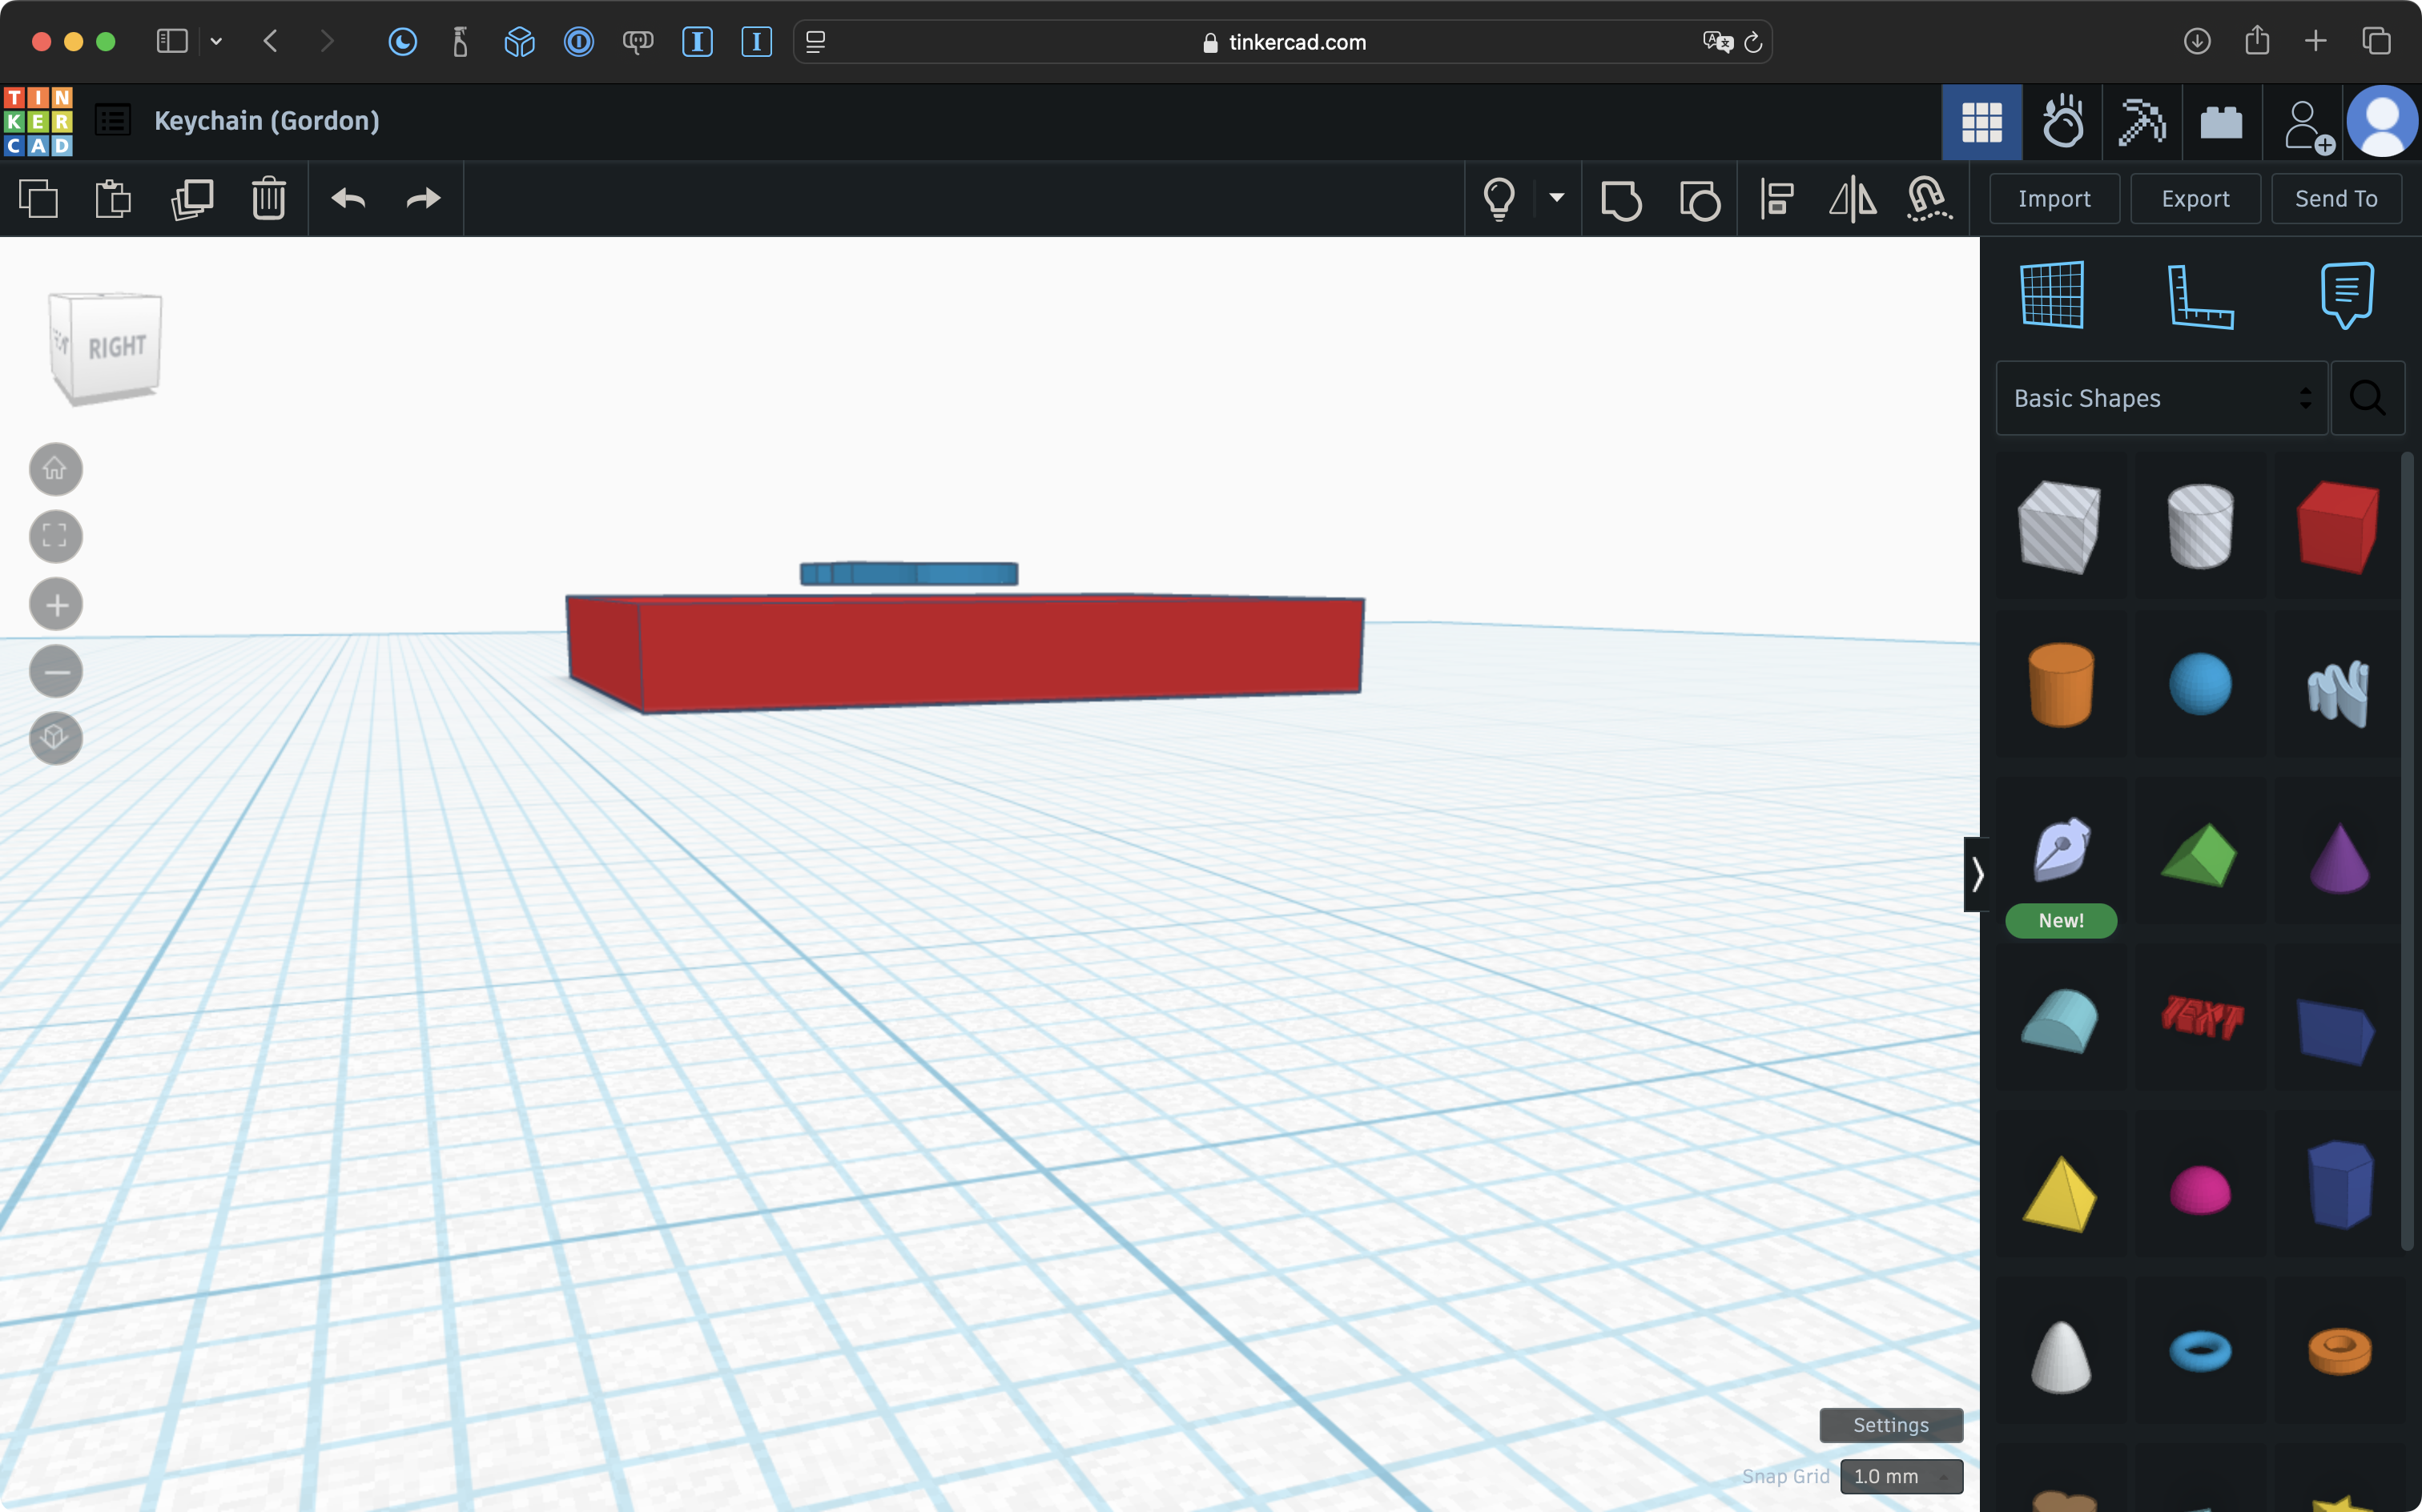
This design will not print successfully.
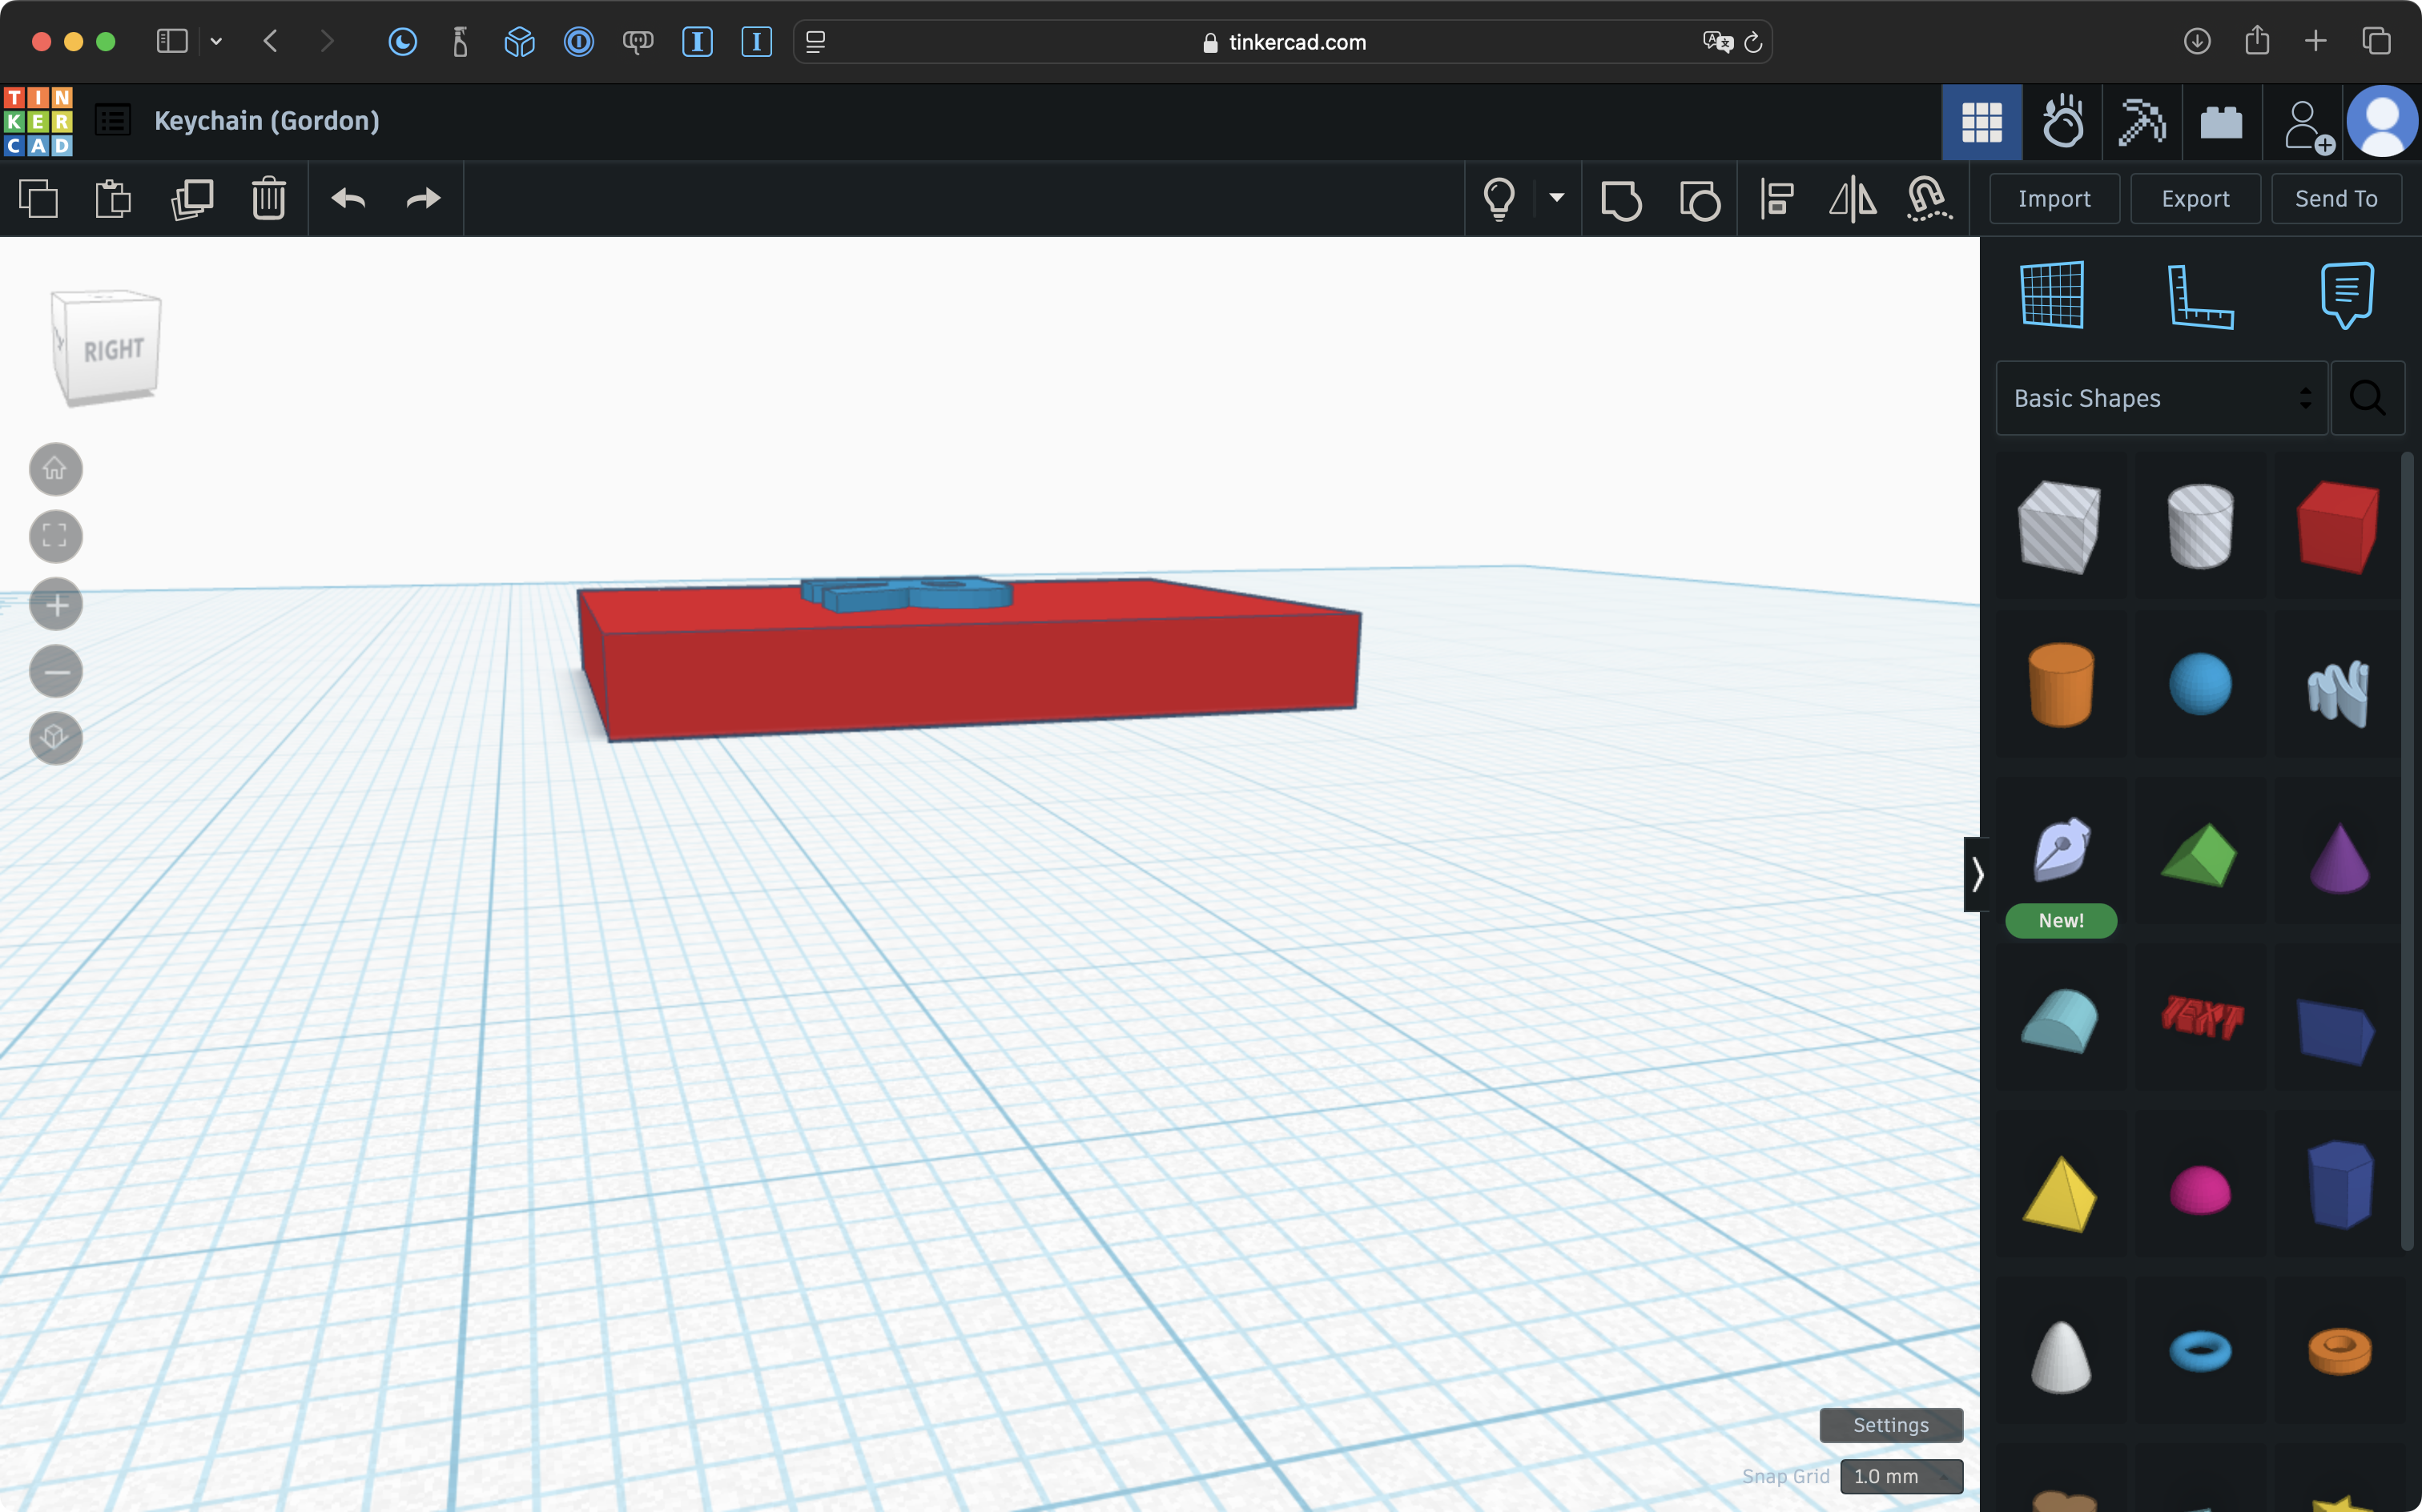
One possible fix would be to add supports below the R but the most correct solution is likely to sink the R into the base of the keychain, like this:
Hangers
Objects with significant portions of the design that are “sticking out” or “hanging off” another part of the design are also unlikely to print successfully.
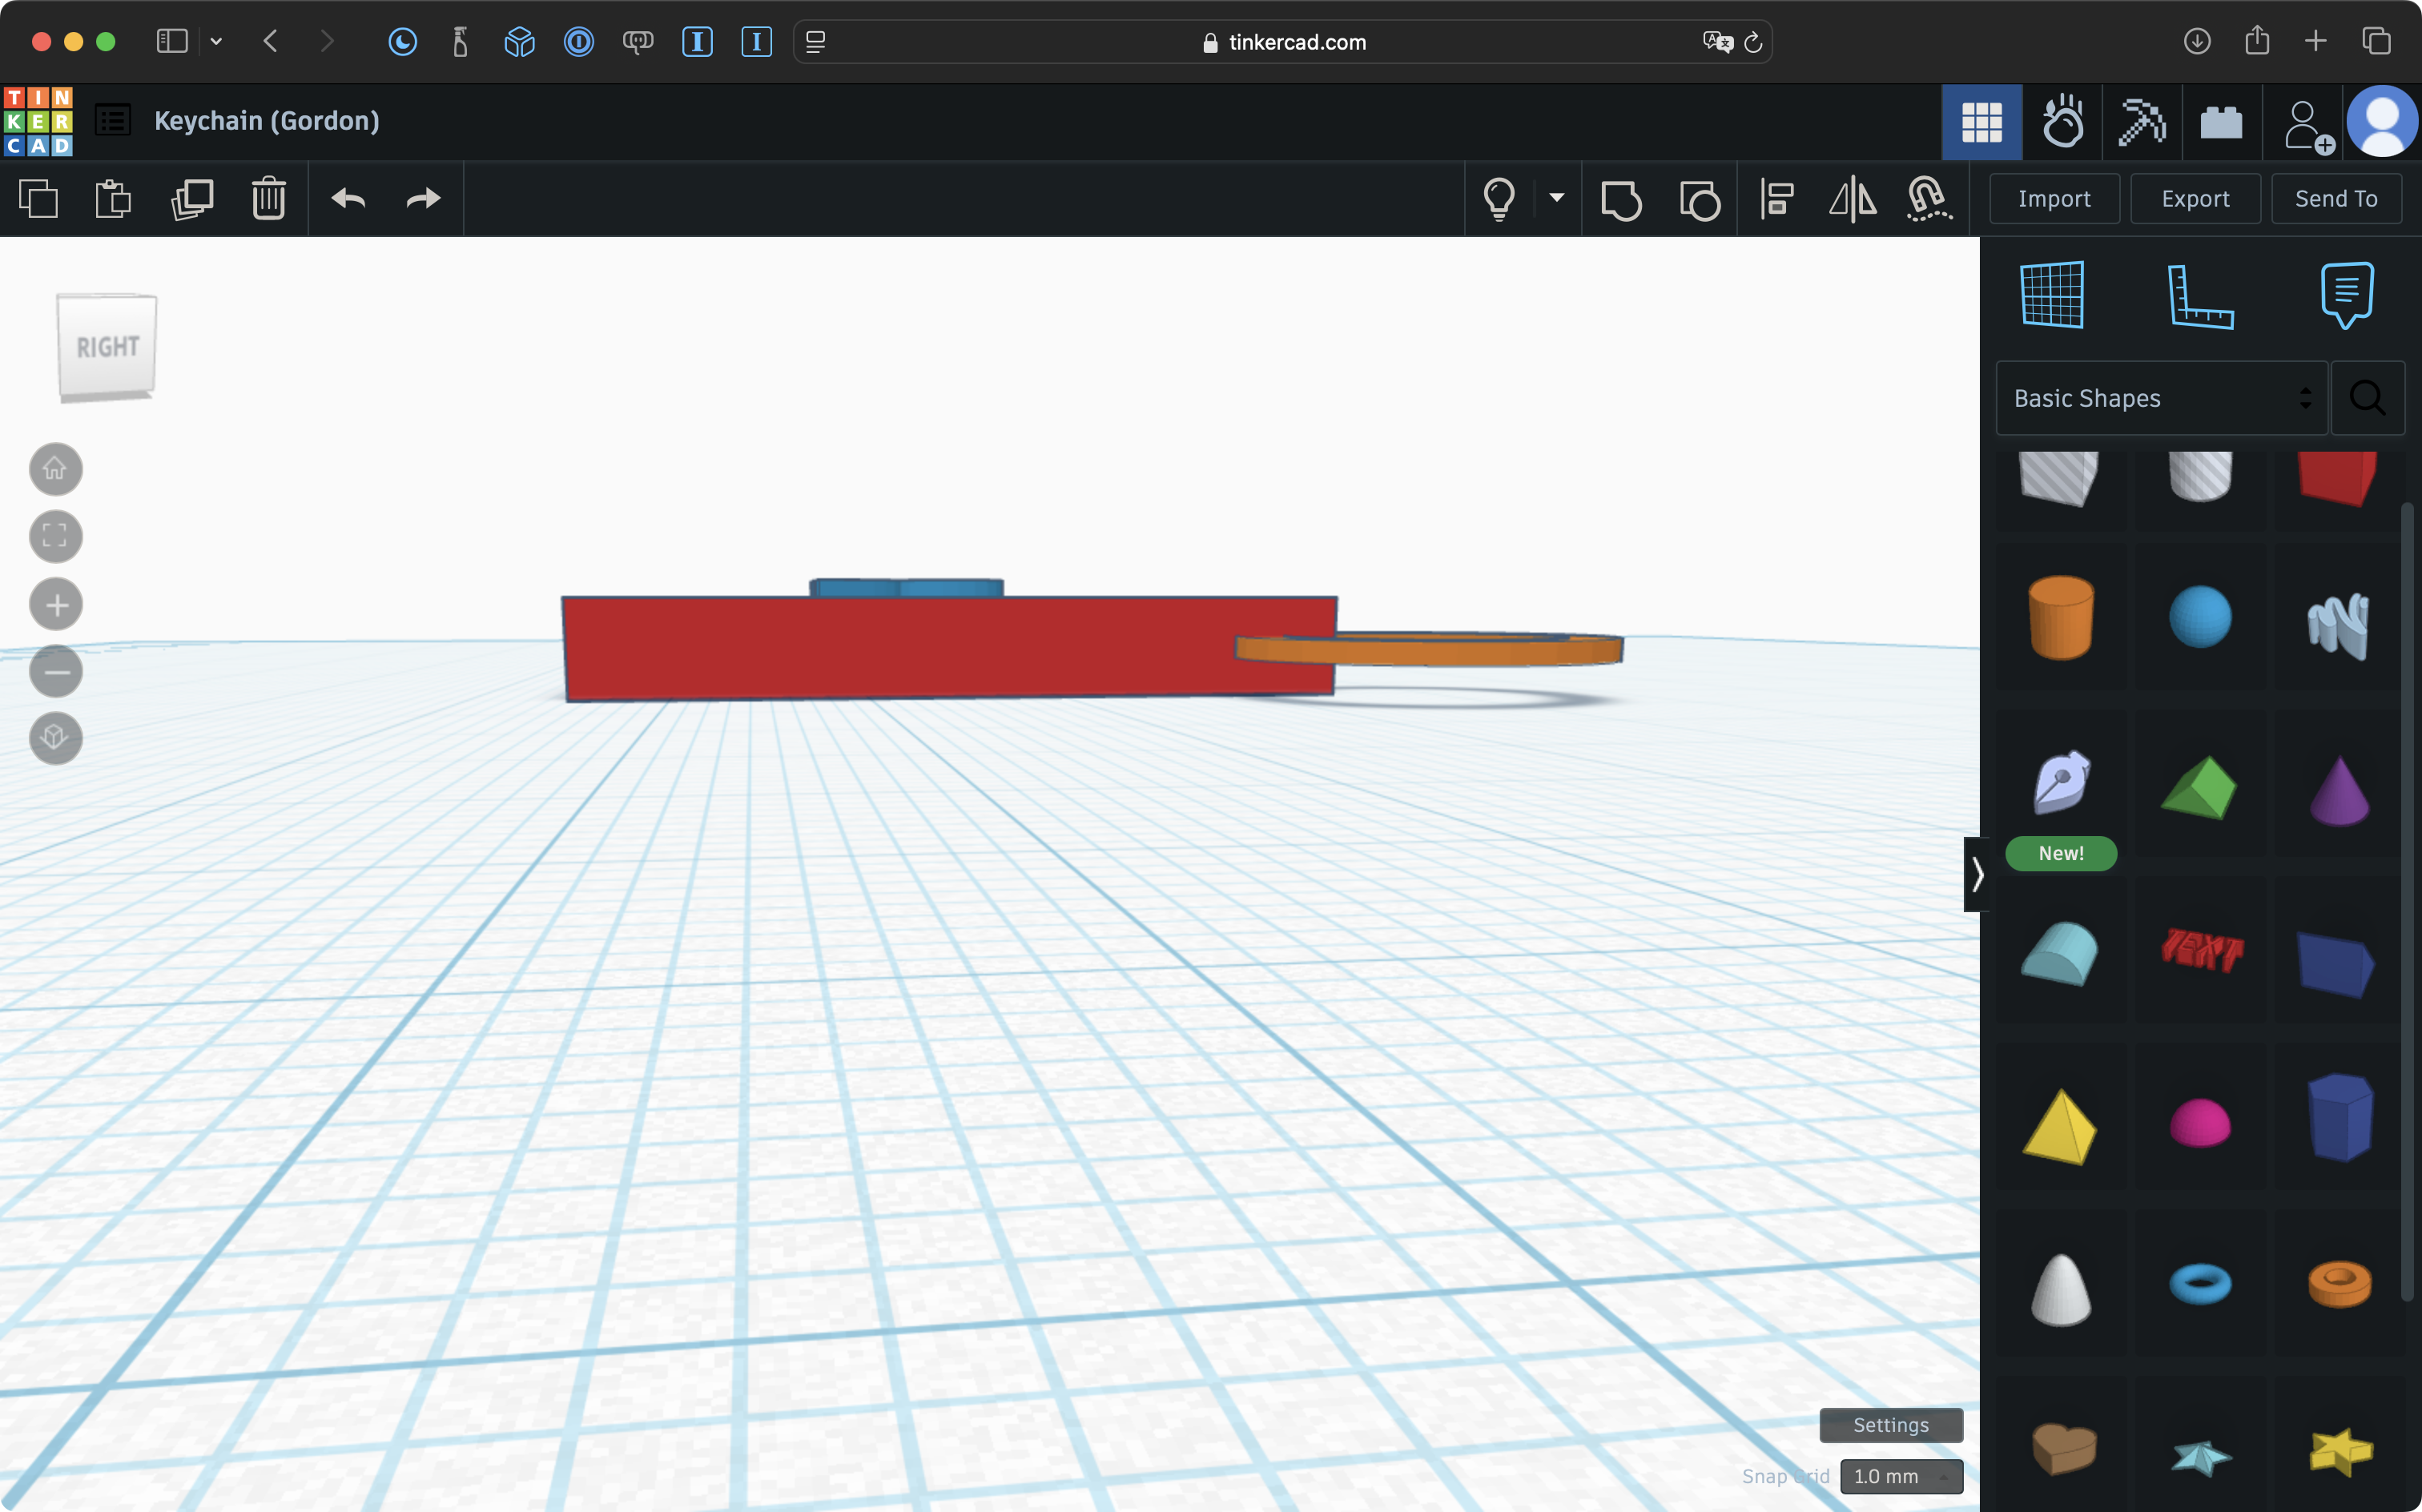
For example, the ring added to the top of this design, to facilitate it’s use as a keychain tag, juts out too far from the rectangular prism:
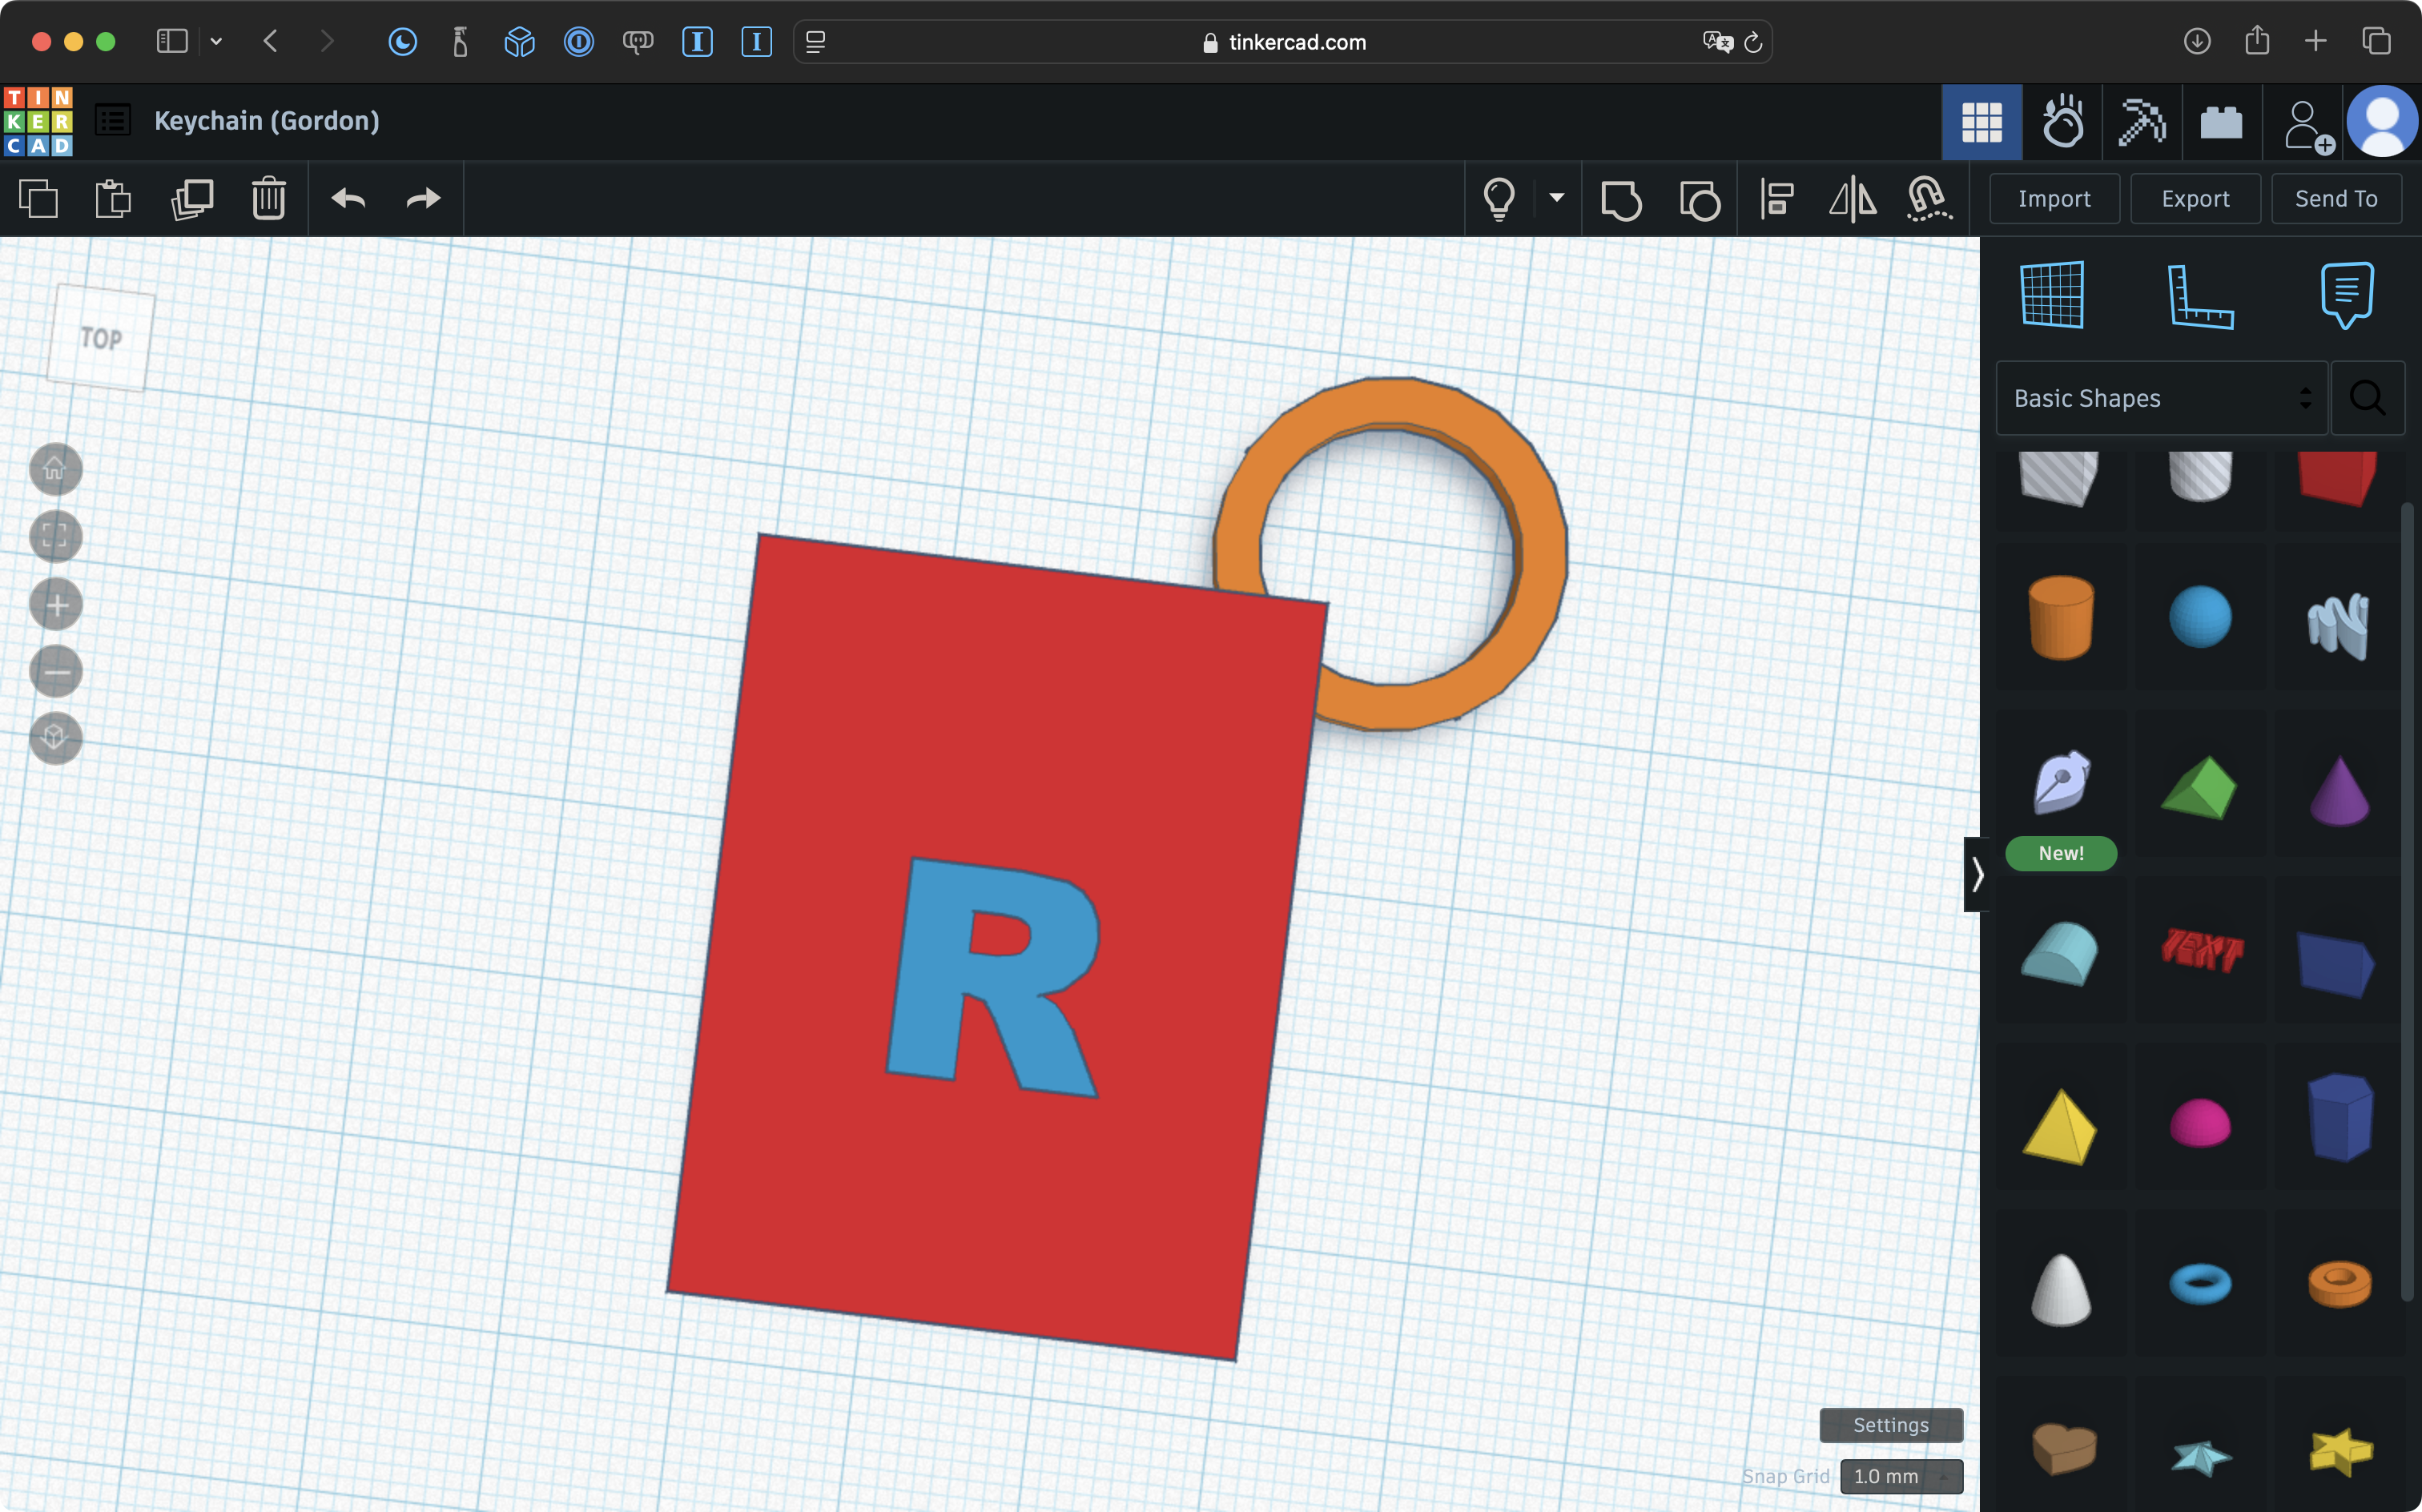
It is also a bit too thin, and is likely to break easily, even if it printed successfully:
An alternative would be to create a simple hole in the corner:
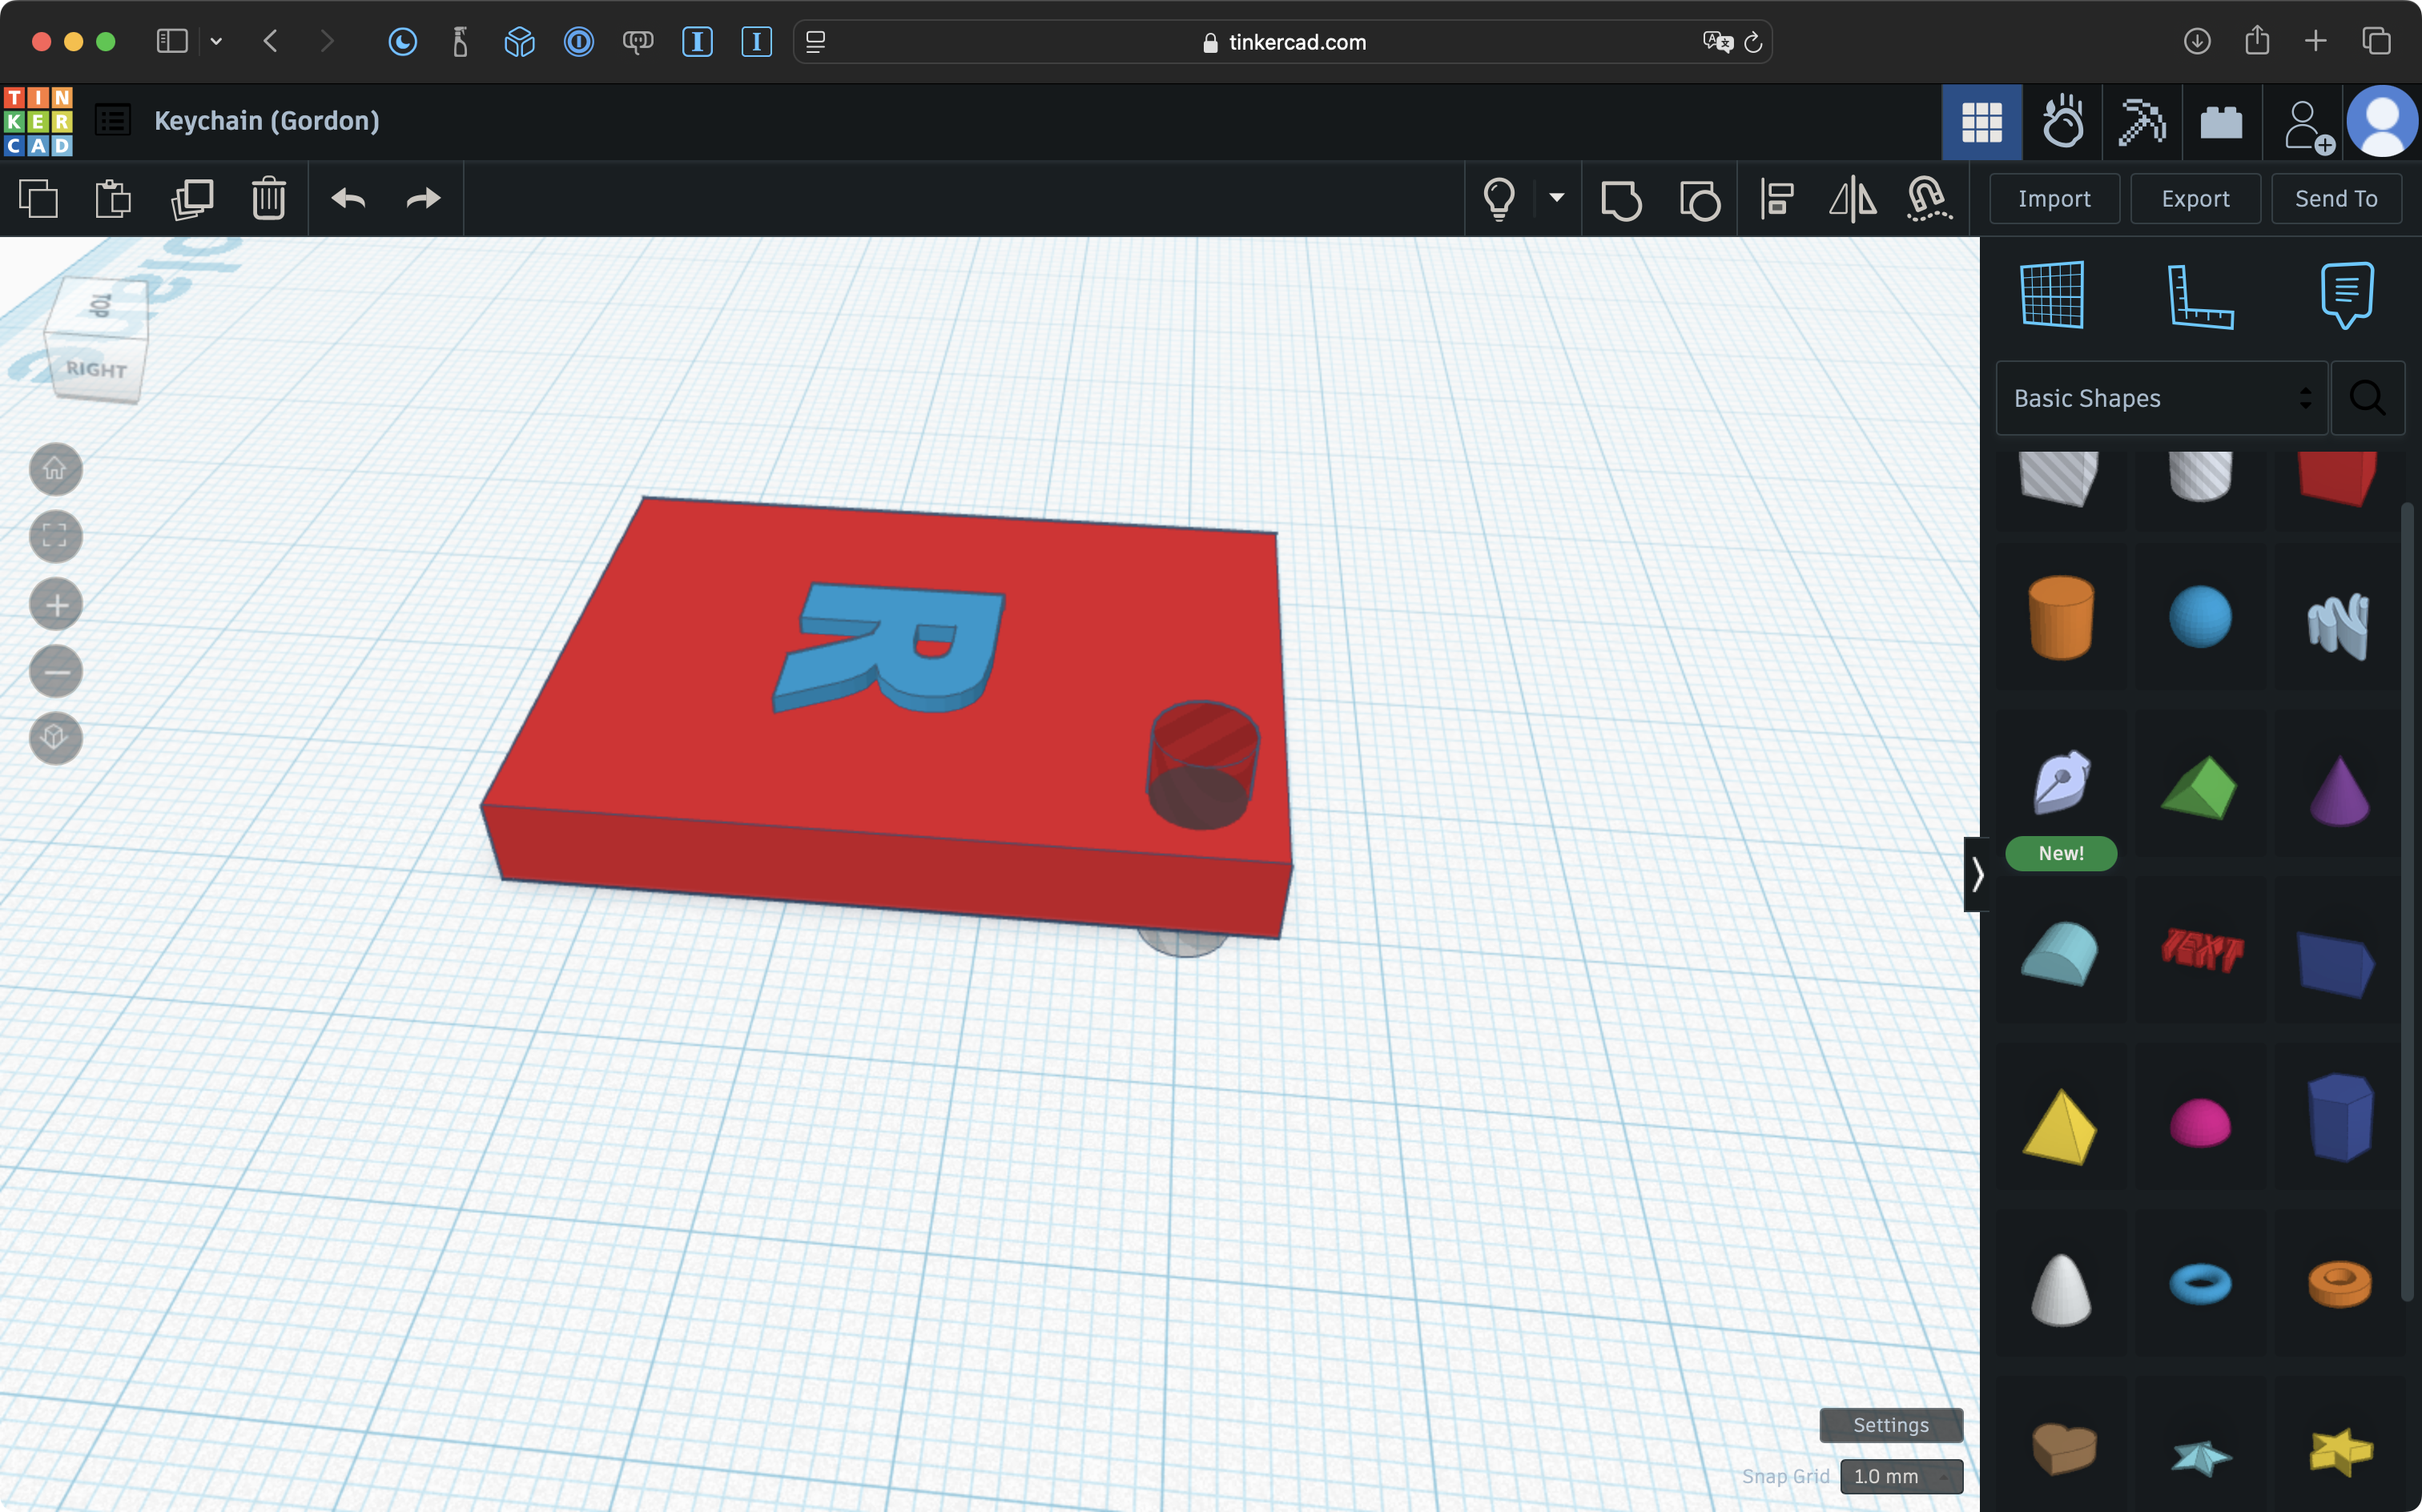
This design will print successfully, and the thickness of the edges next to the hole that remain in the rectangular prism should be sufficient to ensure the print will not easily break when attached to a keychain.
Lack of support
A 3D printer builds objects in layers.
Aim to have a design connect with as much of the workplane in Tinkercad as possible.
For example, the largest face of the rectangular prism currently sits upon the workplane:
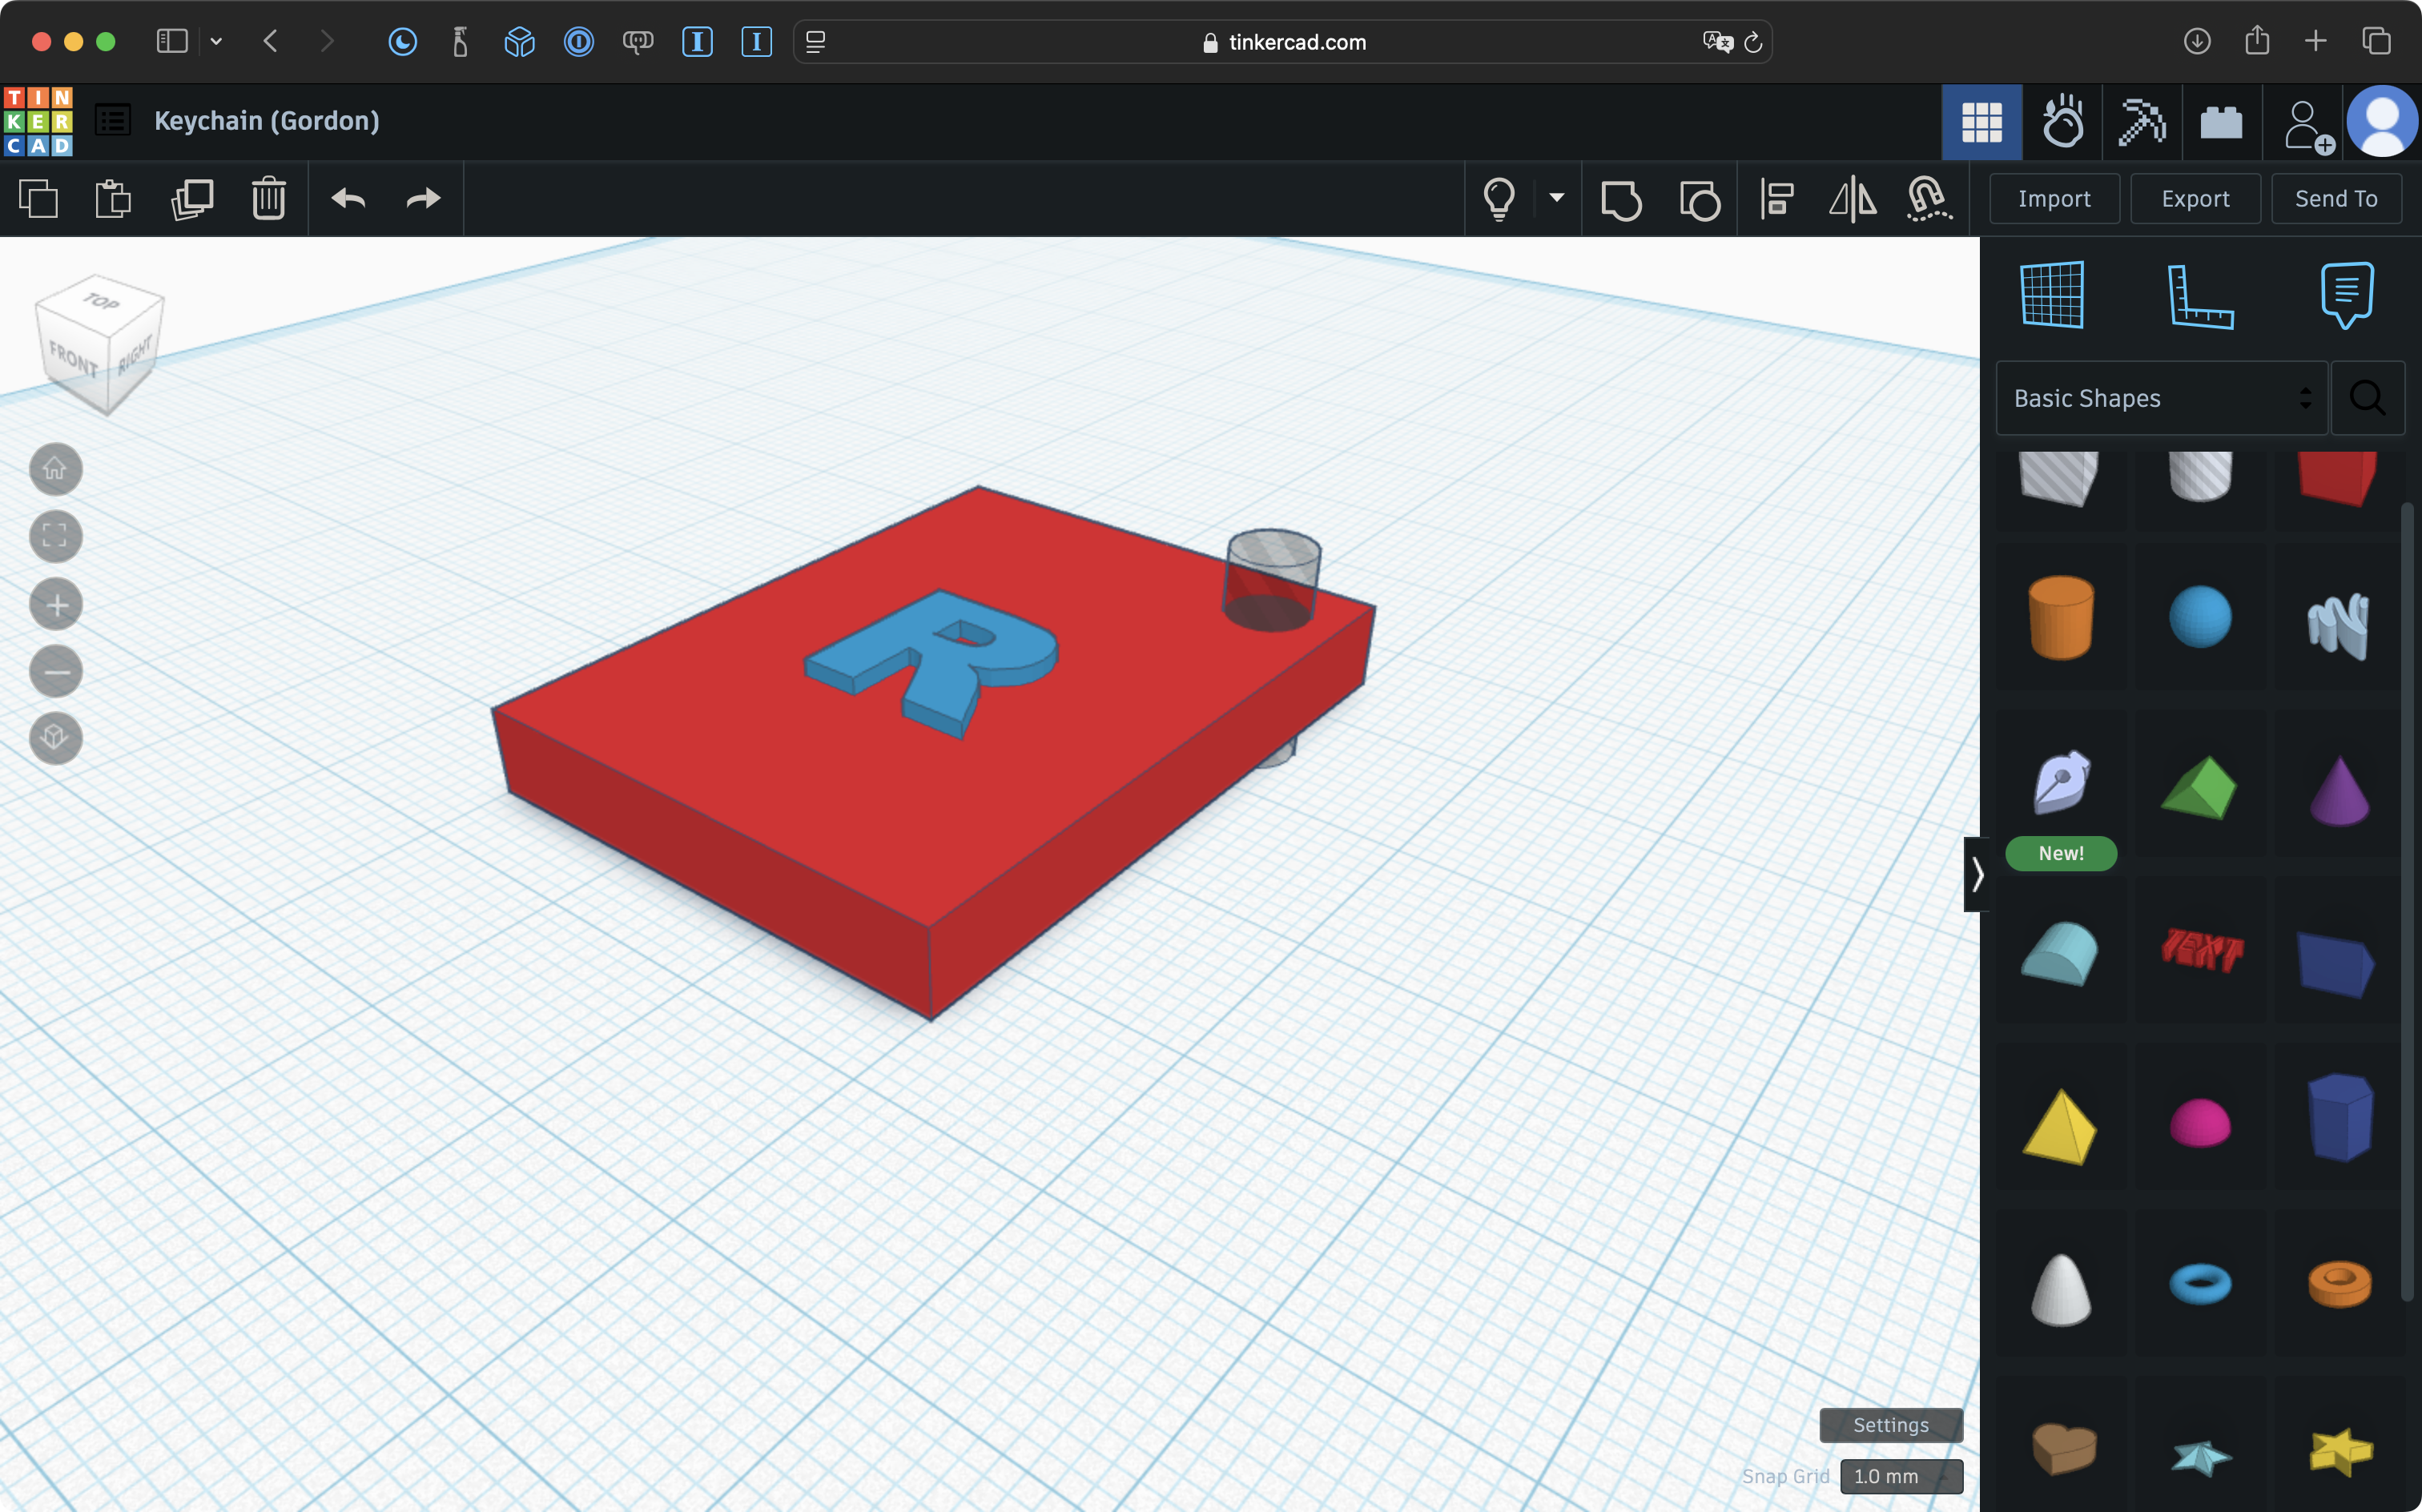
This will print successfully.
However, say that the components of this design were grouped, and then the entire object were rotated such that only a tiny portion of the design connects with the workplane:
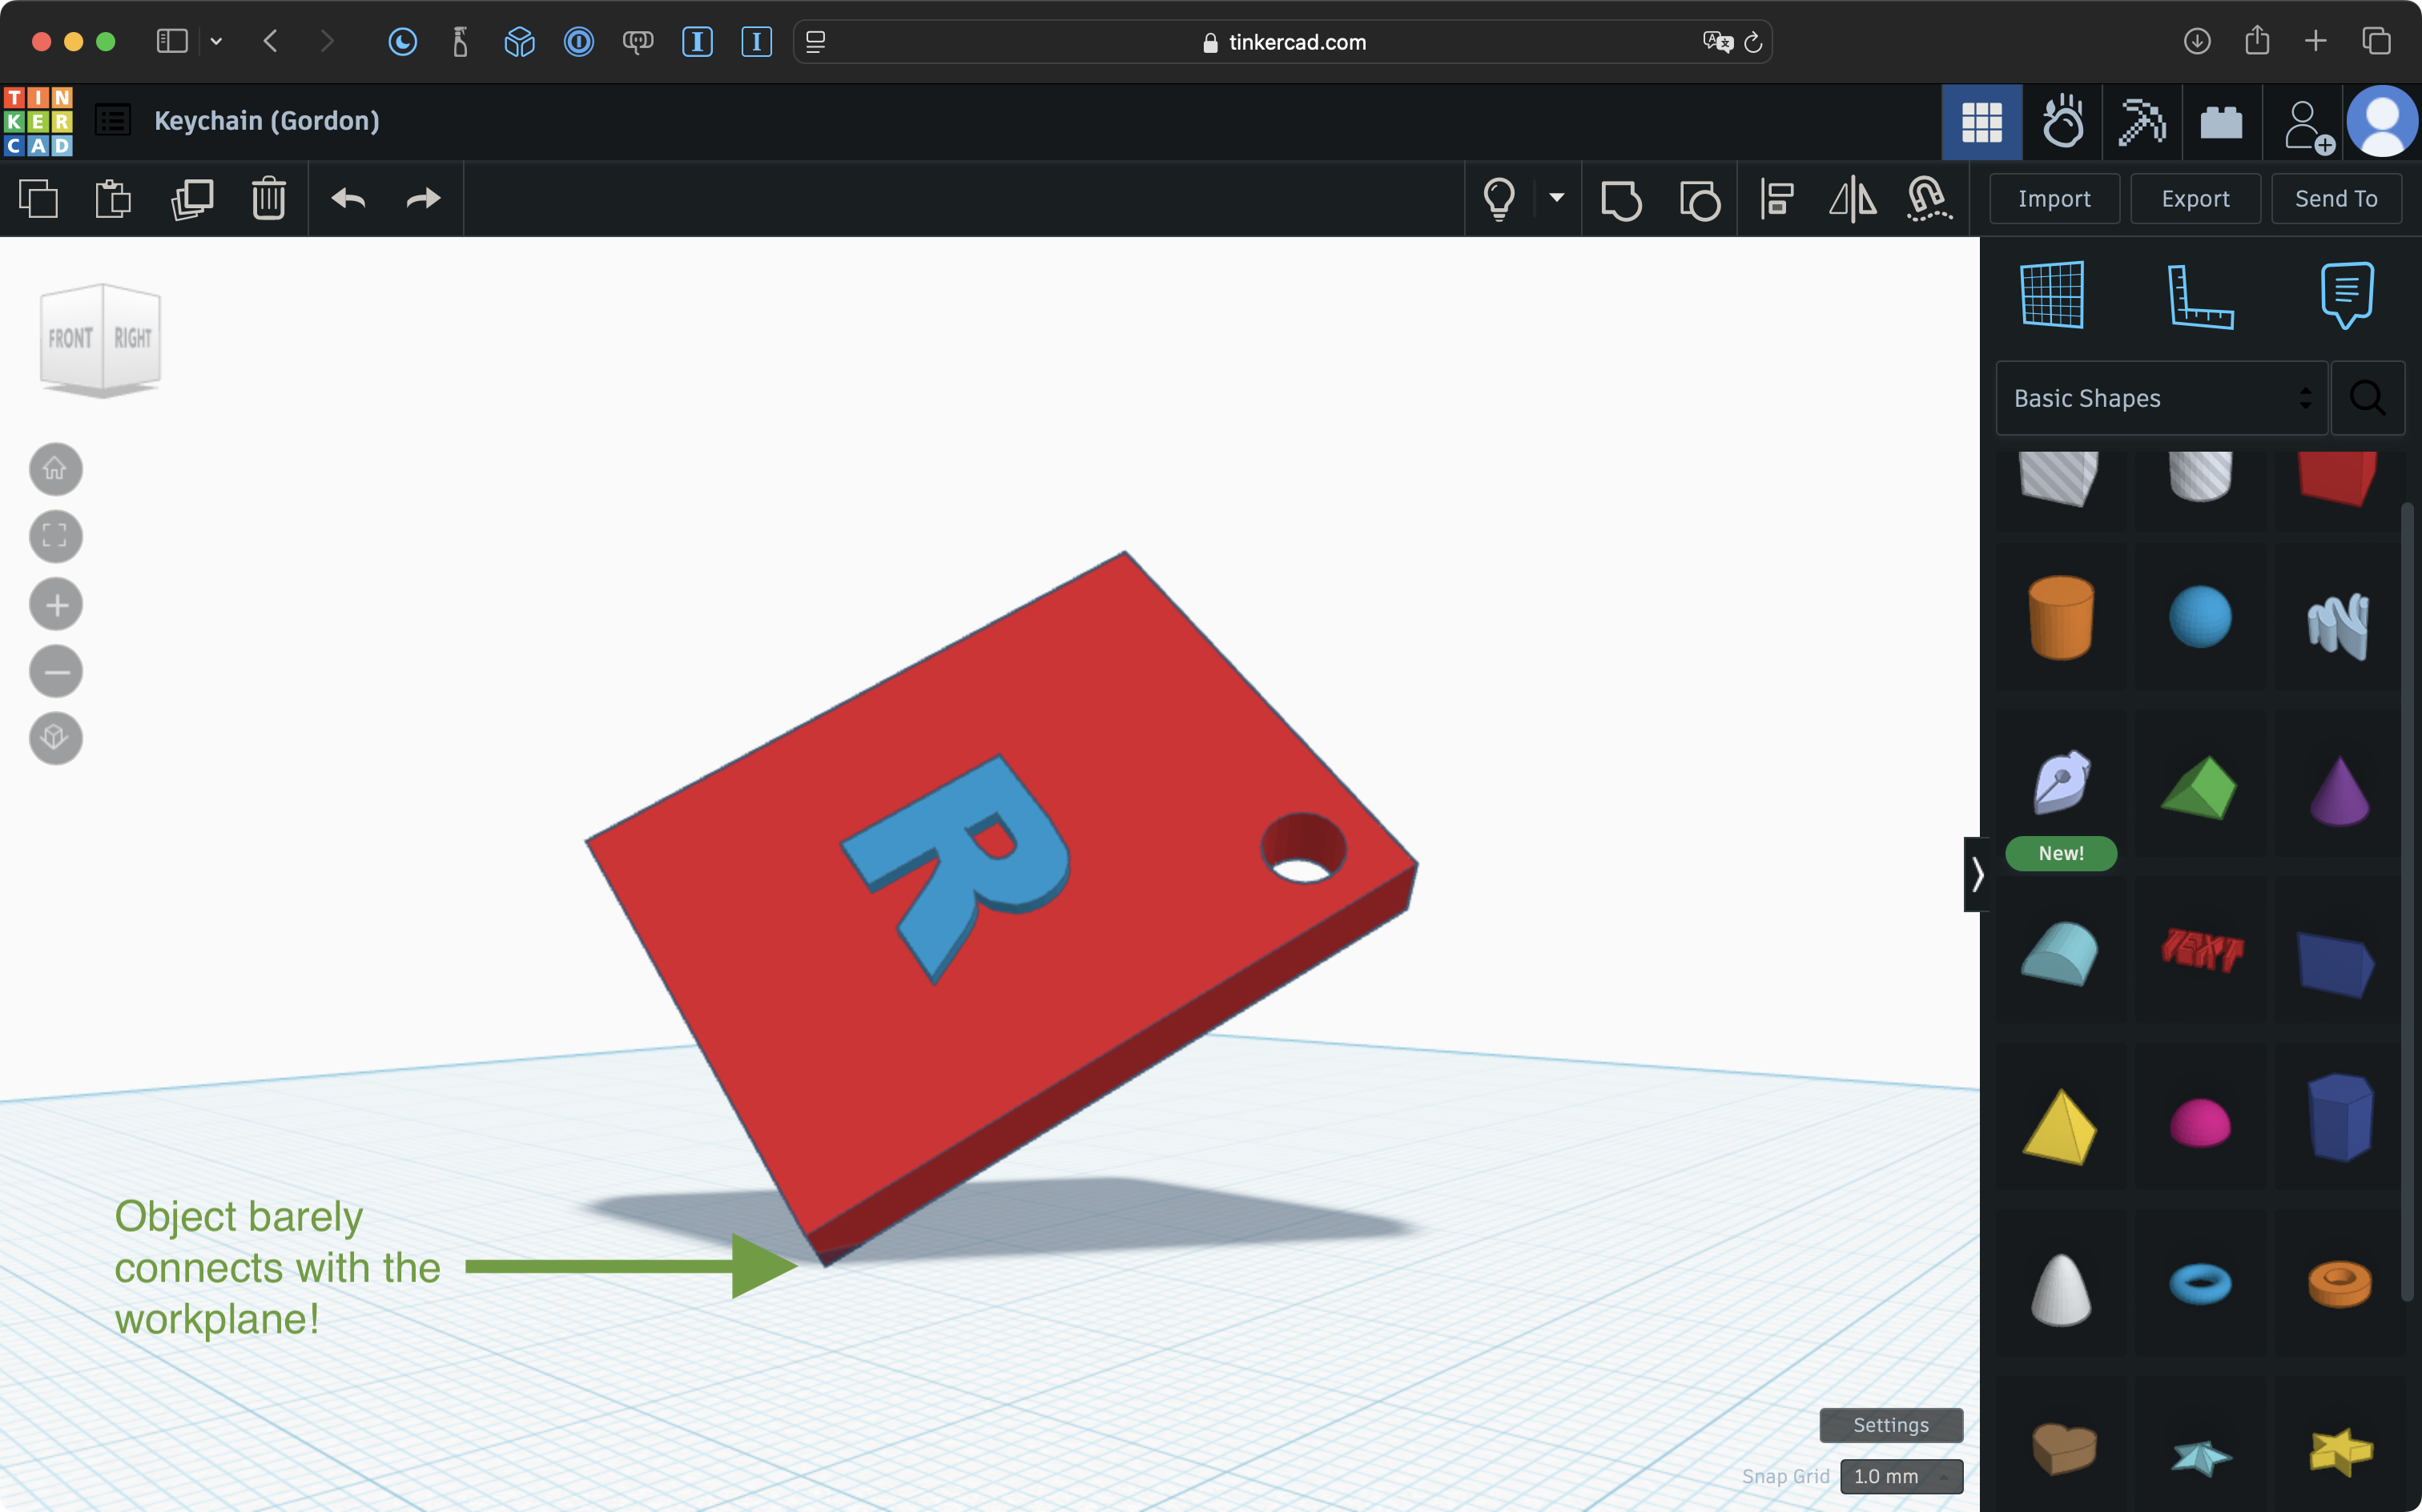
Granted, this is an extreme and somewhat silly example, but you can likely appreciate that this design would not print successfully.
As a rule, orient your designs such that components “touch” the workplane as much as possible. This might mean your design looks “sideways” in Tinkercad, but once printed, you can of course simply rotate the object to whatever orientation you like!
Reviewing your designs
To ensure your prints are made in a timely manner (and to demonstrate your ability to self-diagnose and correct the issues described above) you are asked to create a “fly-through” of your design and to submit this along with your .STL file.
Creating a fly-through means using the screen recording capabilities of your Mac to show your design being rotated in all three dimensions.
Here is an example, showing how to initiate the recording, and then how to rotate the design in multiple dimensions: